
If you’re facing the ATT email login issue of ‘Not able to receive or send emails,’ then you can simply start troubleshooting this particular error with these suggestions and solutions. Let’s get started:
Step by Step Guide to Fix AT&T Login Issues
Suggestion 1: Check/Verify that your ATT Email Server is down or not
Solution: It is suggested that, before moving on to troubleshoot the problem with advanced methods, you should check the mail server of your email account to ensure whether it is down or not, and if it is down then it is down for everybody or just for you. So, to check the email server, follow these simple steps:
- Open your web browser and search for the website ‘Downdetector.in.’
- Once you’re able to locate it, click on the website to open it.
- Under it, search for the ATT email icon from its search bar.
- Then, click on the Continue’ button to check the status of the ATT mail server.
- If the server is down for everybody then you’ve to wait until the AT&T website resolves its server in order to again receive and send ATT emails.
- And, if the server is not down, then move on to the next method.
Suggestion 2: Check/Verify that you’re using correct Email Server Settings
Solution: To ensure that you’ve applied the correct email setting, verify from the below-mentioned server settings and after verifying the same, if you come to know that, you’ve used the incorrect settings, then again to set up your email again using the correct email server settings to start exchanging the process of ATT emails:
ATT Email Server Settings for IMAP Account Type
- Incoming E-mail Server: imap.mail.att.net
- Incoming Port: 993
- Outgoing E-mail Server: smtp.mail.att.net
- Outgoing Port: 465
- Requires SSL: Yes
- Requires authentication: Yes
ATT Email Server Settings for POP Account Type
- Incoming E-mail Server: inbound.att.net
- Incoming Port: 995
- Outgoing E-mail Server: outbound.att.net
- Outgoing Port: 465
- Requires SSL: Yes
- Requires authentication: Yes
Suggestion 3: Check/Verify that you don’t have any Security Conflict
Solution: Sometimes, the faulty settings of your Windows Firewall or any third-party Antivirus can lead to security conflict or interference with the server, programs, and software available on your operating system. And, that is why; this can be considered a reason behind your inability to exchange emails. So, to fix it you need to temporarily disable your security software using these given steps:
To Disable Antivirus
- If you’re using Norton— then to disable it temporarily, click right on the ‘Icon’ of Norton antivirus from your system’s tray and select the option of ‘Disable’ from the contextual menu. After that, also choose the ‘Duration’ i.e., for how long you want to disable it and then click on the ‘OK’ button to finally disable it from your Windows operating system.
- If you’re using by-default available Windows Defender— then to disable it navigate from ‘Windows Settings >Update and Security to ‘Virus and threat Protection’ and after that open the antivirus in order to click on its real-time protection toggle switch to finally disable it.
- And, if you’re using any other antivirus, then you can contact its company for the same.
To Disable Windows Firewall
- To temporarily disable Windows Firewall, open the ‘Windows Start’ menu, select ‘Windows control panel’ and from there, click on ‘Windows Firewall.’
- Then, under it, click on the ‘Turn Windows Firewall off or on’ option in order to finally disable the Windows Firewall from the Windows Operating system.
Suggestion 4: Check/Verify that you’ve not received any Temporary Error Codes
Solution: The problem of ‘Not being able to receive or send email’ can also be caused by two types of errors i.e., Permanent or Temporary errors. But majorly users face problems from temporary errors like “TAE 1, 2, 4, 5, 6, 8, 13, 14, 15, 17, 18, 21, 46, Error O3Farm and Launch FFC-1, etc. And, from these, mainly the TAE 5, TAE 13 and TAE 18 errors are responsible for the “Not able to send or receive email error.” So, if you’ve faced any of these then, let’s just have a quick overview of these errors so that in future you can deal with these errors effectively!
- TAE 5: Different/Multiple locations access errors: This ‘TAE 5’ error code simply depicts that you have been accessing your email account from different devices and from various multiple locations.
Solution: Logout from all the accounts from all devices and multiple locations. And, then sign-in back to your AT&T account from one single location and device.
- TAE 13: Program interference error: In this error code, some computer programs like the ‘Browser add-ons’ prevent your ‘text toolbar’ from working, and therefore, it causes problems related to sending emails.
Solution: To fix this error try these steps:
- First and foremost, clear your browser’s cache and cookies.
- Then, restart your browser and sign-in to your AT&T account.
- Once logged in, go to your email account and click on the ‘Compose’ button.
- Then, from the right of the formatting toolbar, select the ‘Double-arrow button.’
- This way, you can complete your email, and also be able to send it.
- TAE 18: Internet connection error: Users mainly get a ‘TAE 18’ error due to a network connectivity issue. So, if anyone receives this error then, it simply means that the internet is not properly connected to your device from which you mostly access your email account.
Solution: Use these steps to eliminate the error:
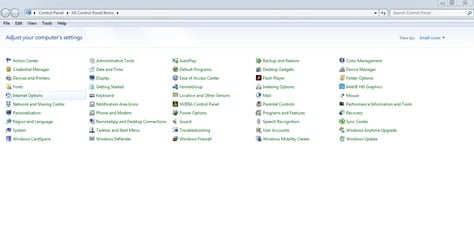
- Open the ‘Windows Start Menu’ and from there, select ‘Control Panel.’
- Under it, click on the ‘Network and Sharing Center.’
- After that, on the next window select ‘Troubleshoot Problems’ from the bottom.
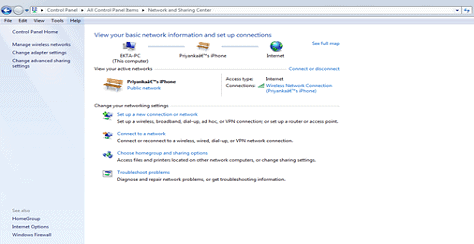
- And then simply select the ‘Internet Connections’ option in order to launch the assistance tool.

- After that, restart your router, modem and operating system in order to re-connect it to the Wi-Fi.
- And, then to make sure that your ‘Wi-Fi’ is on and connected well; again open the ‘Windows Start’ menu and click on its ‘Settings’ to further open the ‘Network & Internet’ option. Then, click on the ‘Wi-Fi’ option and select ‘Show available networks.’ That’s it! Choose the network from the available list and click on ‘Connect’ it.
However, if still, you face this error, then you have to check the ‘DNS settings’ of your Internet connection. And, if the settings are not configured by ‘default’ then take help from the AT&T mail login problem.


